Wednesday, July 13, 2016

Project Madeira Extensions: Extension Marketplace (Microsoft AppSource)

You may need functionality considered 'extra' when using Project Madeira for your implementation. 'Extras' can be considered functionality that is 1) not base to the Project Madeira application and 2) may be business vertical specific.

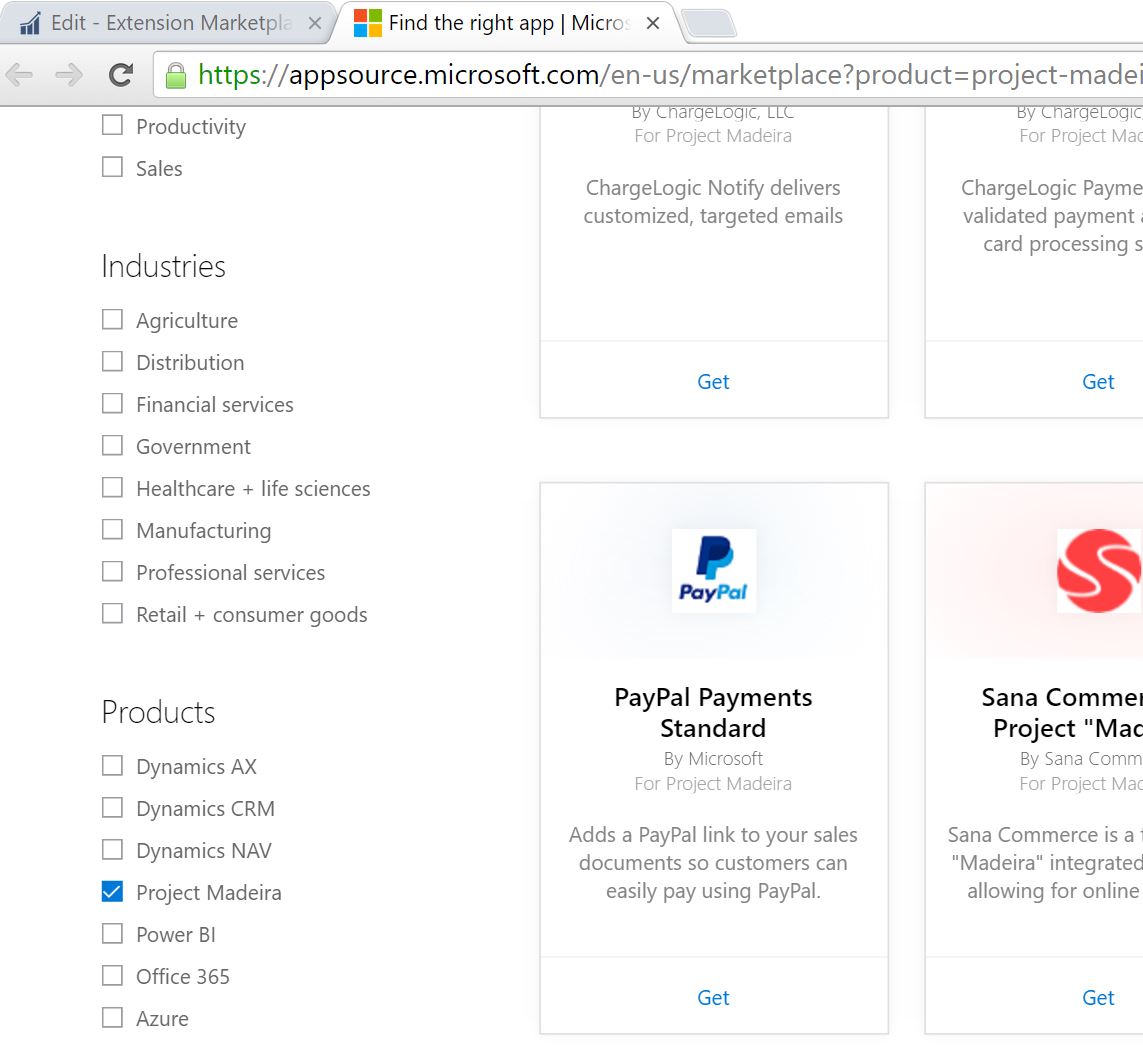
You can 'extend' your Project Madeira applications by implementing these 'extensions' to your code base. Do this from the main menu in Figure 1 below. From there, you can view the 'Extension Marketplace', as well as navigate to AppSource directly and auto-filter the apps by app (Figure 2). Once in AppSource, you can see all the available apps you can add to your application (Figure 3). 

Figure 1 - Adding extensions to your code base

Figure 2 - the apps you can browse from the Microsoft AppSource store

Figure 3 - The navigation to AppSource, filtered for the specific application
 

Sunday, July 10, 2016

Project Madeira

Microsoft has a cloud offering in the SMB space called Project Madeira. It is currently in Beta. There is not estimation as to when it will be Released To Web (RTW). Read the welcome to Project Madeira here: https://madeira.microsoft.com/en-us/documentation/madeira-get-started/ 

You can download the app to your Office365 account. As of July 2016, its fairly basic but it should expand its functionality down the road. There is no plans for on-premise deployment.

Project Madeira is based on Navision and even says 'Navision' when you get a permissions error trying to log into the application [see below].


I see this being positioned into the Quickbooks, GnuCash (my open source preference), and Peachtree area. I can see it eventually going the way of NetSuite and other Cloud-based ERP solutions once the mobile story is more enhanced and functionality is increased.

The program is still in beta so this could change radically by the time the product is released, but I figured it would be good to document where the product is at currently.

Here is the list of actions you can do to date:

  • Business Areas
    • Finance
    • Banking
    • Sales
    • Purchasing
  • Users/General
    • emails/logging
    • Office Addins
  • Financials
    • Dimensions
    • Account Schedules
    • COA and GL
    • Receivables
    • Automatic Paymnets and reconciling bank accounts
    • Collections
    • Sales Tax
    • Payables
    • Payments
    • Bank accounts
    • year closing
  • Sales
    • Create Quotes/Sales
    • Invoicing
    • Selling products
    • Correct or cancel unpaid invoices
    • Sales returns/cancellations
    • Create customers
  • Purchasing
    • Create POs
    • Purchasing products
    • Correct or cancel unpaid purchase invoices
    • Purchase returns for cancellations
    • Create Vendors
  • Inventory
    • Create Items
    • Adjust inventory
    • Adjust item costs
    • Post inventory cost to GL
  • Relationship Management 
    • Dynamics CRM connection
    • Marketing and Contact Mangement Setup
    • Contacts
    • Interactions
    • Segments
    • Sales Opportunities
  • Across Business Areas
    • Number Sequences
    • Extended Texts
    • GL Management
    • Send Documents by Email
    • Use Allocation Keys in General Journals
    • Schedule a report to run
    • Report Layouts
    • Workflows
    • Incoming Documents (Manage/Setup/Process)

Wednesday, July 6, 2016

How to: Create a new Yammer Group on Yammer

From time to time you will need to create a 'group' within your organization. That 'group' will need to talk. I'd suggest doing two things to help in communication: 1) Create a distribution group via email and 2) create a Yammer group. There are more yes, but these two are key.

If you need to create a Yammer Group:
  1. Navigate to Yammer
  2. Once in your group, you should see a grey bar on the left hand side
  3. At the bottom of that bar, you should see a plus sign (+) and 'Create a new group'. 
  4. Click and enter the name of the group
  5. Add the user to the group. 
  6. Let people know in either hte yammer or email distribution group to invite whoever else might be relevant. 

Figure 1 - 'Create a new group' under the Office 365 Yammer Group

Sunday, June 26, 2016

Dynamics AX User Group (AXUG) Twitter Promotion Optimization

Here are a few ways to make sure your Dynamics AX User Group (AXUG) tweets on Twitter are viewed by the most people possible:
  1. When tweeting about your chapter, include: @AXUG and #AXUG.
  2. Follow other AXUG chapter leaders and members of Dynamics Communities
  3. Use the following hashtags
    1. #MSDynAX - Microsoft Dynamics AX products
    2. #AXUG - AX User Group Hashtag
    3. #AXUGSummit - The AXUG Summit official hashtag
    4. #AXUG<YourCity> - To link specific posts to your chapt
    5. Use a # that links to the key topics in your tweets such as #EDI, #Retail, #Manufacturing, #SupplyChain, etc
    6. Include other twitter users at the meeting in the tag via '@'
Make sure to follow Scott Steinmetz on twitter at @ScottAXUG

Tuesday, June 21, 2016

Dynamics AX R3 very large text in modules in RDP

When logging into Dynamics AX 2012 R3 (or other versions) via RDP, you'll sometimes see very large text in the modules and object names (Figure 1). The big text is annoying and doesn't really make navigation a delightful experience.

You can fix it through the below:
  • Right click on the Dynamics AX icon on your desktop
    • If you don't have an icon, do the following:
      • Go to the Start menu
      • Type Dynamics AX
      • Right click on the icon in the search window results
      • Click ' Open File Location'
      • Create a shortcut from that Dynamics AX program link to the desktop (right click and create shortcut to desktop, copy paste, etc)
  • Select 'Properties' (Figure 2)
  • Under 'Compatibility' tab, check the 'Disable display scaling on high DPI settings' checkbox (Figure 3)
  • Reopen Dynamics AX via this icon (Figure 4)
Figure 1 - AX with 'big' navigation names

Figure 2 - Right Click on AX icon and select properties

Figure 3 - 'Compatibility' tab and 'Disable display scaling on high DPI settings' box

Figure 4 - The corrected AX navigation

Friday, June 10, 2016

Skype for Business Error: 'The request failed. Please try again. Make sure that you are signed in to Skype for Business'

I was attempting to create and send a meeting invite through Outlook 2016 with a Skype meeting attached to it. The meeting was for one hour. I was inviting one other person not from my company. 

Error:
Sometimes you will get the error 'The request failed. Please try again. Make sure that you are signed in to Skype for Business' when you are trying to add the Skype meeting to the invite, before you send it out. I was getting this message AFTER the call in information was added and when I was trying to send the message.


Issue:
I'm not entirely sure what the issue is and I wasn't able to find it online. It was for sure an issue with adding attendees to the meeting. Restarted Outlook, restarted Skype for Business, same old song and dance. Did not restart my computer as I just need to move forward. 

Resolution:
I found I was able to create the Outlook calendar meeting and add the Skype information to the meeting successfully. The issue is with adding a user to the meeting. 

Don't add other attendees to the meeting. Just create the meeting for yourself with the Skype information. Then, once the meeting is created and closed, forward that calendar invite to the attendees. That worked like a charm for me. 

Hope this helps some people out!

Friday, March 4, 2016

Dynamics AX Modern POS New Feature: Welcome to Retail POS introduction screen

When first logging into your Dynamics AX Modern/Cloud POS, you will notice a new 'Welcome to Retail POS' video. This is a great new addition to the Modern POS experience and will allow users who are not familiar with the software to get some navigational overview.

This video has several videos to watch with a voice doing a narrative (Figure 1). The user can then click 'Start Exploring Now' and jump directly into the POS.

From here, there will be a little bubble that pops up with helpful information while the app is fully accessible for the user (Figure 2). The information guide bubbles will sometimes even have arrows to help the users see the features the bubble is describing (Figure 3). When the buttons are clicked on, another will pop up.

This cadence will keep occurring for the users regardless if its their first time logging into the MPOS or not. You will need to navigate to the corner settings button (Figure 4). Here is where you can select one of the two options below:
  • Don't show me the app introduction next time
  • Don't show me the app tour next time
Just have the users flip these flags. You can also make it so all the MPOS devices to have this not turn on. That's key for when your users are already trained and can start the

As this is a new feature, things may change in the future but, until then, that's it.

Figure 1 - The welcome tour video

Figure 2 - The guide bubbles in the POS

Figure 3 - A guide bubble pointing to a new feature.

Figure 4 - The 'Settings' icon in the upper right corner of the app

Figure 5 - A look inside the MPOS 'settings' view